Apart from hearing that sweet humming sound rising from the wheels or buzzing from the hubs, the bicycle is engineered to be a quiet machine. Hearing the cacophony of squeaks, clinks, and clunks is not only annoying but a sure sign that the bike is sending you a signal of distress. Ignore her calls at your peril.
Most of these non-normal sounds can be fixed by simply tightening the nuts and bolts on your bike. The vibration from all our rides, whether road or gravel, does cause nuts and bolts to loosen their grip, thus causing clamor. There are other reasons why your bike makes a ruckus, but the purpose of today’s lesson is to tend to the NUTS. If after tightening the nuts and bolts, the clangor continues, stop by your favorite mechanic for a check.
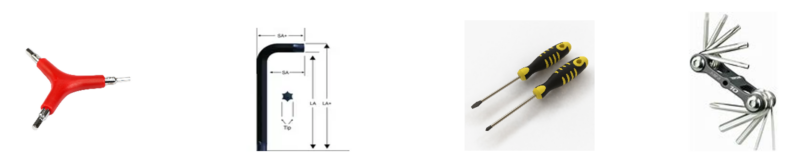
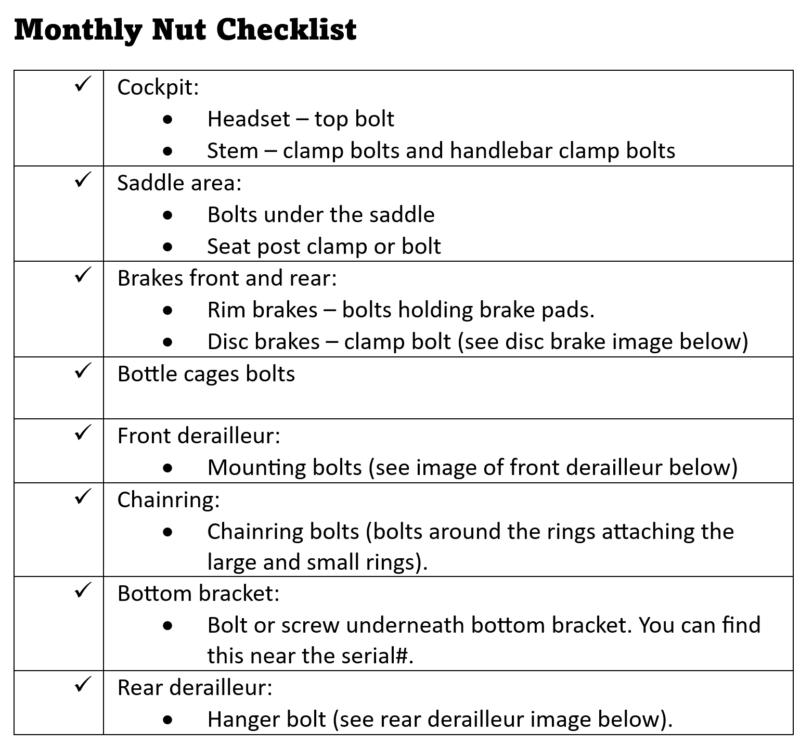
Items you will need to adjust the nuts: Allen wrenches* (metric), Torx wrench* (they are like wrenches but have a star-like tip), flat and Phillips screwdrivers*, a rag, music, and a cool beverage.
*You will find most of these tools in your multi-repair tool set.
I begin at the cockpit, or top front, of the bike and work my way back and down to make sure I hit all the bolts. When checking the bolts and nuts, make sure not to apply too much force as this may cause “stripping.” A stripped screw or bolt is when its head gets damaged to a point where it cannot be tightened or loosened. Also, look at the bolts ahead of time to know which ones will need tightening with a Torx wrench (star-like tip) or regular Allen wrench. And remember: righty-tighty, lefty-loosey.
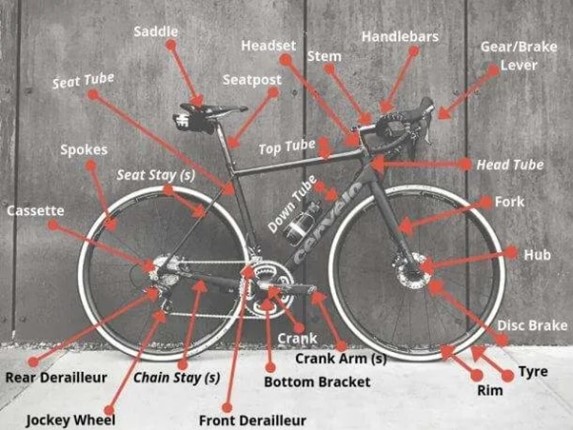
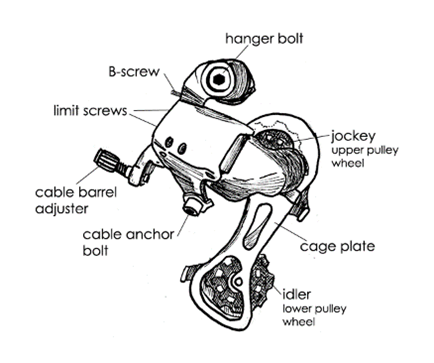
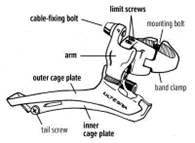
A Monthly Nut Checklist with accompanying images has been prepared specially for you … keep scrolling down!
Note: Your bike parts have other screws and bolts not mentioned in the checklist. Only adjust the bolts mentioned below and refer to the images for guidance, or find me after a ride and I’ll be happy to help you locate these.
Happy Riding!
Comments are closed.